Tri Color Bell Pepper Fried Rice & Bell Pepper Chutney

HI Friends,
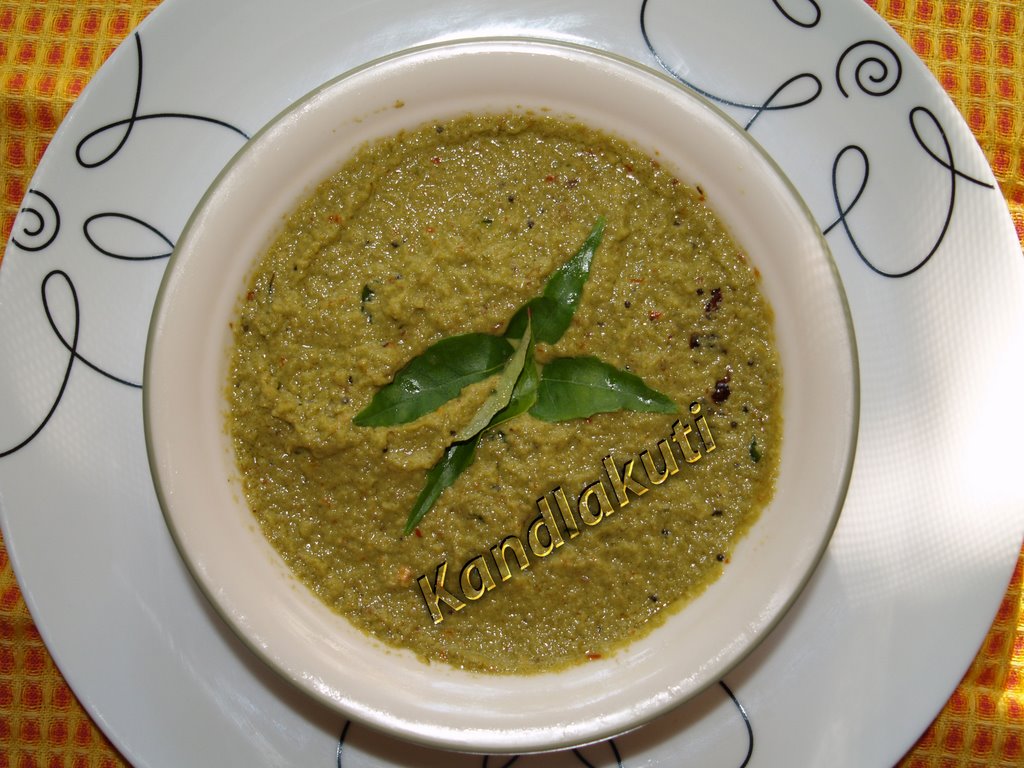
Coming to today's post, Iam here with two recipes at a time. Bellpepper FriedRice & Bellpepper Chutney. Though, both are prepared at different times (I mean day too!!). But thought of posting at a time, togeather, since both are co-related with there names starting with same vegetable i.e., Bell Pepper:-) To say about fried rice, I had to beg my brother "Ravi" for this recipe. After reading this recipe, you may think do any body really need to beg for this?? Answer is "Even I thought the same thing after he told me the recipe":-)). It such an easy, yet, very delicious recipe. I should say, Instant Fried Rice. But I thank him for such an easy and wonderful recipe. He actually cooked this fried rice with peas and beans as vegetables along with bell peppers, for my son's cradle cermony. Each and every guest of ours enjoyed a lot:-) Next is Bell Pepper Chutney. I read many post on Red Bell Pepper Chutney. I found all of them very intresting. Since I had above three bell peppers (tri color) in store, which are actually bought to prepare fried rice, with left over ones, I went and prepared the chutney. It is really good as our fellow blogger and dear friend Indira of "Mahanandi" said (in her words) "Red Bell Pepper chutney goes well with any break fast dishes like idli, dosa, upma, rice or chapathis". Here is her version of Red Bell Pepper Chutney. Though my version is completely different from her's, I was much inspired by her recipe to prepare this chutney. Thank You Indira:-) Iam also sending thease recipe's for Kalyn's Kitchen most happening event "Holiday Cooking With Herbs".

Ingredients:
--------------
3 small sized bell peppers different colors( I took green, orange & red: used 1 small green pepper;1/2 of each orange & red bell pepprs. Since they both were big)
2 Cups Basmati rice (or long rice)
1 Medium sized white onion
2 Green chillies
1 tsp Cumin seeds
2 tsp soya sauce (or even less if you don'nt like the sauce taste and flavour)
Oil for cooking (1 Tbsp or 3tsp)
1 to 1/2 tsp Freshly grated pepper(or as per your taste)
Salt (as per taste)

Method:
-----------
----------------------------------------------------------------------------------------------------------
Bell Pepper Chutney:
----------------------------- Ingredients:
----------------
2 small size green bell pepper
1/2 of orange and 1/2 of red bell peppers of medium sized
2 tsp chenna dal
2 tsp urad dal
1 lime size tamarind
1 big stem curry leaves
1 tsp cumin seeds
4 to 5 red dry red chillies
3 tsp oil
salt to taste
Fresh cilantro to garnish
Method:
---------
I changed my blog to beta version today. I found some changes in comments. Like, those who have chaged to beta version, there names are not shown and converted as Anonymous. Iam sorry about that. So, my request is please do mention your name when you leave a comment. So that I will know you and can reply back. This thing, to say,I really found strange. Can any body say the reason why?? Thank You:-))
Coming to today's post, Iam here with two recipes at a time. Bellpepper FriedRice & Bellpepper Chutney. Though, both are prepared at different times (I mean day too!!). But thought of posting at a time, togeather, since both are co-related with there names starting with same vegetable i.e., Bell Pepper:-) To say about fried rice, I had to beg my brother "Ravi" for this recipe. After reading this recipe, you may think do any body really need to beg for this?? Answer is "Even I thought the same thing after he told me the recipe":-)). It such an easy, yet, very delicious recipe. I should say, Instant Fried Rice. But I thank him for such an easy and wonderful recipe. He actually cooked this fried rice with peas and beans as vegetables along with bell peppers, for my son's cradle cermony. Each and every guest of ours enjoyed a lot:-) Next is Bell Pepper Chutney. I read many post on Red Bell Pepper Chutney. I found all of them very intresting. Since I had above three bell peppers (tri color) in store, which are actually bought to prepare fried rice, with left over ones, I went and prepared the chutney. It is really good as our fellow blogger and dear friend Indira of "Mahanandi" said (in her words) "Red Bell Pepper chutney goes well with any break fast dishes like idli, dosa, upma, rice or chapathis". Here is her version of Red Bell Pepper Chutney. Though my version is completely different from her's, I was much inspired by her recipe to prepare this chutney. Thank You Indira:-) Iam also sending thease recipe's for Kalyn's Kitchen most happening event "Holiday Cooking With Herbs".
With not much delay here I go with both recipes.....
Bell Pepper Fried Rice
-------------------------------
Bell Pepper Fried Rice
-------------------------------

Ingredients:
--------------
3 small sized bell peppers different colors( I took green, orange & red: used 1 small green pepper;1/2 of each orange & red bell pepprs. Since they both were big)
2 Cups Basmati rice (or long rice)
1 Medium sized white onion
2 Green chillies
1 tsp Cumin seeds
2 tsp soya sauce (or even less if you don'nt like the sauce taste and flavour)
Oil for cooking (1 Tbsp or 3tsp)
1 to 1/2 tsp Freshly grated pepper(or as per your taste)
Salt (as per taste)

Method:
-----------
- Rinse rice in cold water only once (to avoid them from breaking).
- Cook in pressure cooker with 1:2 ratio (i.e., if 1 cup rice then 2 cups water).
- Cook rice with 1/2 tsp cumin seeds in it and 1 to 1/2 tsp oil(for rice grains to be separate from each other)
- After rice is cooked, allow it to cool in a wide plate.
- Mean while, cut bell peppers into thin & long pieces & don'nt forget to deseed them.
- Cut onion also into thin & long pieces. Cut green chillies into small pieces. keep all of them a side.
- Take a wide non_stick pan(because, in non stick when you fry any vegetables, on high heat , they take less oil), heat oil, add another 1/2 tsp cumin seeds and fry till they start spluttering.
- Now, add green chillies and fry for 2 seconds. Add all three bell peppers and fry till they become little soft yet little crunchy too. This is very important here, to enjoy their flavours while eating fried rice:-)
- First fry them for 2 min with open lid. Then cover the lid and allow to cook for 2 to 3 more minutes.
- Once they are cooked as desired, add salt and pepper. Mix well and fry with open lid for couple of minutes.
- Now add soya sauce and mix well. Finally, add rice bit by bit (i.e., in small portions) and mix well with other ingredients. Use some wooden spectula to avoid rice from breaking.
- Fry for 2 to 3 minutes with open lid and serve hot.
Note:  You can add peas & beans(if fresh vegetables cook them before and keep aside). They really make dish more rich. Also you can add soya granules (soaked in warm water for 1/2 hr and add to the dish with other vegetables). I cooked only with bell peppers, to know there flavour more and enjoy them. It was very good with oit adding any other begetables too:-) Also, if using fresh pepper, then add carefully, since fresh pepper will be more spicy than others.
 You can add peas & beans(if fresh vegetables cook them before and keep aside). They really make dish more rich. Also you can add soya granules (soaked in warm water for 1/2 hr and add to the dish with other vegetables). I cooked only with bell peppers, to know there flavour more and enjoy them. It was very good with oit adding any other begetables too:-) Also, if using fresh pepper, then add carefully, since fresh pepper will be more spicy than others.
----------------------------------------------------------------------------------------------------------
Bell Pepper Chutney:
-----------------------------
 Ingredients:
----------------
2 small size green bell pepper
1/2 of orange and 1/2 of red bell peppers of medium sized
2 tsp chenna dal
2 tsp urad dal
1 lime size tamarind
1 big stem curry leaves
1 tsp cumin seeds
4 to 5 red dry red chillies
3 tsp oil
salt to taste
Fresh cilantro to garnish
Method:
---------
- Before proceeding, wash and soak tamarind in warm water till other preparations are done.
- Cut bell peppers into roughly small cubes. Do not de-seed them.
- Heat oil, in a wide and little depth pan, add cumin seeds and fry till they start spluttering. Add channa dal and urad dal and fry till they change into light brown.
- Now break and add dry red chillies and fry till they start changing color into dark. And add curry leaves and fry for few seconds.
- Now add all cut bell peppers and fry till they become little soft.
- Finally add soaked tamarind and fry for 1 minute and remove from heat.
- Allow the contents to cool and grind them bit by bit with desired salt in a food processor into a fine paste.
- Finally garnish with fresh cilantro. Enjoy with chapathis, hot plain rice, idli, dosa etc.


Labels: bell pepper, bell pepper chutney, bell pepper fried rice, chutney, pickel, rice