
Masala Brinjal Curry (Vankaaya Masala)


Hi Friends! Iam back after a short trip to Atlanta & Orlando for Thanks Giving Holidays. We had a very good time there. I hope same with you too:-) I will update some of my trip photographs in my intoduction post after some time. Right now as I said..I will be back with good recipes in store, today Iam here with one of the traditional recipe and all time favourite from my mom's kitchen called "Vankaaya Masala". We call this recipe vankaaya Masala (brinjal spices), since masala(spices) used in this recipe is the key for this tasty dish, ofcourse Brinjal's should be very tender and fresh once to get more taste and flavour to the dish. I thought to blog some specific recipes with photographs as main, to explain the dish. One I did mooli paratha and now Iam going to do with this recipe. With no delay..here I go....
Ingredients For Main Cooking:
-----------------------------------------
..Fresh Brinjals 10 to 12 of same size
..1 big onion
..2 medium lemon sized tamarind
..1 big stem curry leaves
..zeera or cumin seeds 1 tsp full
..1 tbsp fresh cut cilantro
..oil for cooking (2tbsp) (you can decrease if you want to 1tbsp, but for more taste 2tbsp)
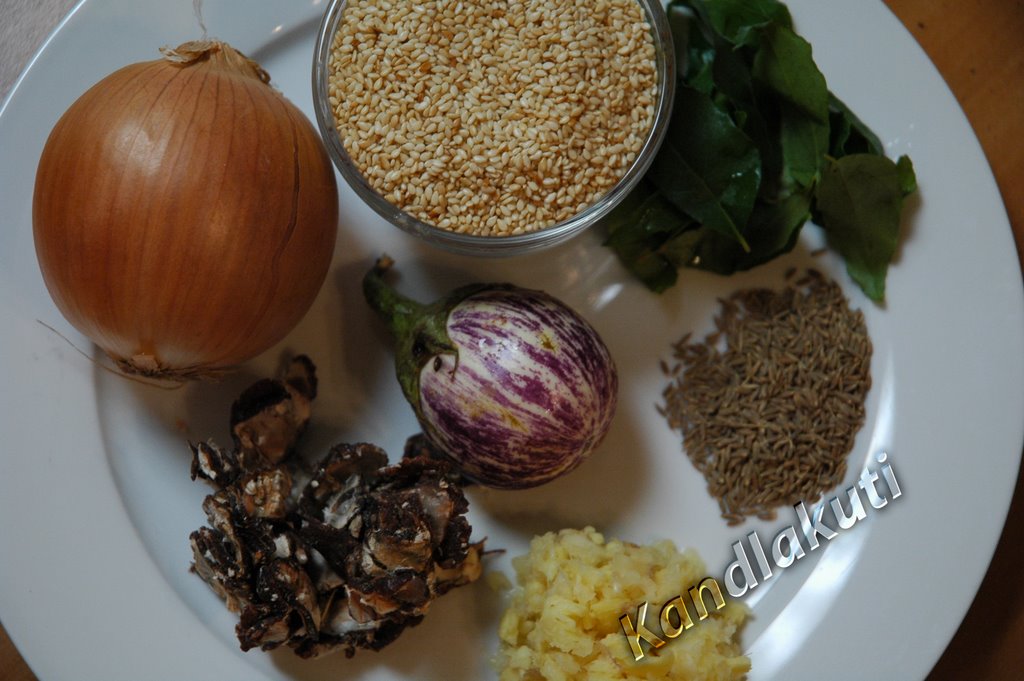
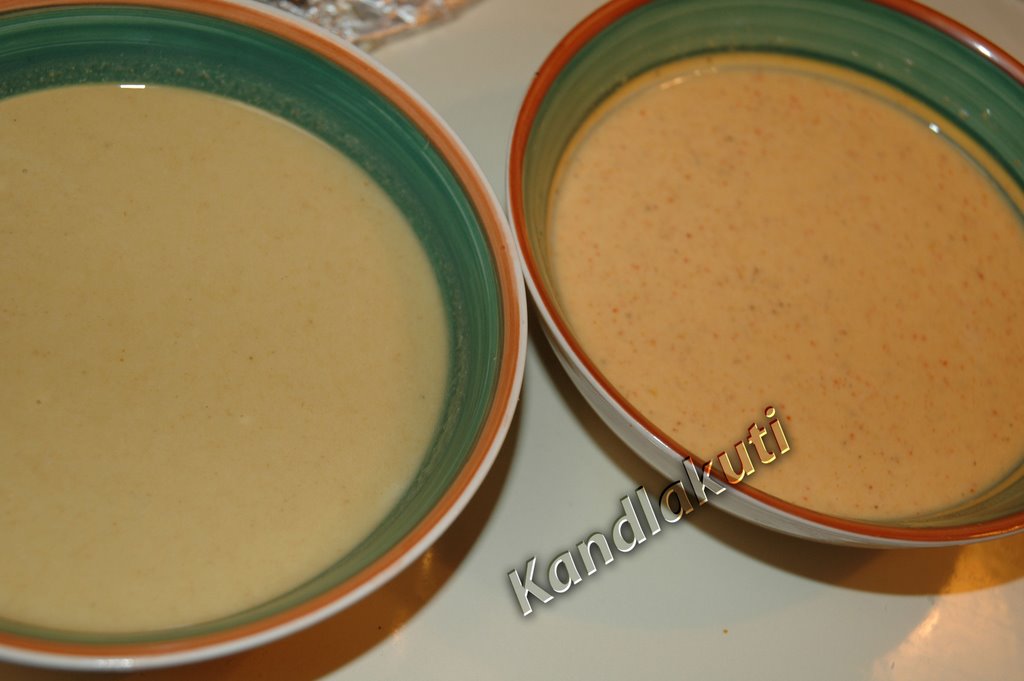
Ingredients For Masala:(you can see all masala powders in below pic togeather)
---------------------------------
..2tsp white sesame seeds roasted powder (Nuvvula podi)
(here I roasted sesame seeds and mixed with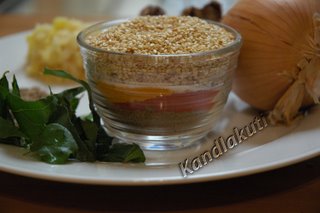 other powders in blender since I did not had its powder ready)
..1tsp cumin seeds roasted powder (Jilakara podi)
..1/2 tsp Methi seeds roasted powder (menthula podi)
..2 or 2 1/2 tsp Coriander roasted powder (Dhaniyala podi)
..2 tsp Dry coconut powder (kobbari podi)
..2 or 2 1/2 tsp Red chilli powder
..2 tsp turmeric powder
..Salt as per your taste (I recommend 2 to 2 1/2 tsp salt)
..2 tsp Ginger-Garlic paste
Method:
-----------
My Variations:
-----------------
You can replace brinjals with fish pieces too. My mother cooks the same way for both fish and brinjals. Only difference is here you add brinjals first, where as If you use fish than add it after all the the masala and tamarind juice is cooked togeather and cook till fishes are done. Though brinjals are cooked fast, remember fishes are even cooked more fast comparitively.
Note:
---------
You can prepare all the spice powders by roasting them individually and powder them and can store, so that, when ever you want prepare this dish you can just add masala powders or spice powders then, which can save your time and energy. Also add methi powder still less if you want, since it gives little bitter taste, if added more. Recommended amount in this recipe is fine. Enjoy the dish:-))
Ingredients For Main Cooking:
-----------------------------------------
..Fresh Brinjals 10 to 12 of same size
..1 big onion
..2 medium lemon sized tamarind
..1 big stem curry leaves
..zeera or cumin seeds 1 tsp full
..1 tbsp fresh cut cilantro
..oil for cooking (2tbsp) (you can decrease if you want to 1tbsp, but for more taste 2tbsp)
Ingredients For Masala:(you can see all masala powders in below pic togeather)
---------------------------------
..2tsp white sesame seeds roasted powder (Nuvvula podi)
(here I roasted sesame seeds and mixed with
 other powders in blender since I did not had its powder ready)
..1tsp cumin seeds roasted powder (Jilakara podi)
..1/2 tsp Methi seeds roasted powder (menthula podi)
..2 or 2 1/2 tsp Coriander roasted powder (Dhaniyala podi)
..2 tsp Dry coconut powder (kobbari podi)
..2 or 2 1/2 tsp Red chilli powder
..2 tsp turmeric powder
..Salt as per your taste (I recommend 2 to 2 1/2 tsp salt)
..2 tsp Ginger-Garlic paste
Method:
-----------
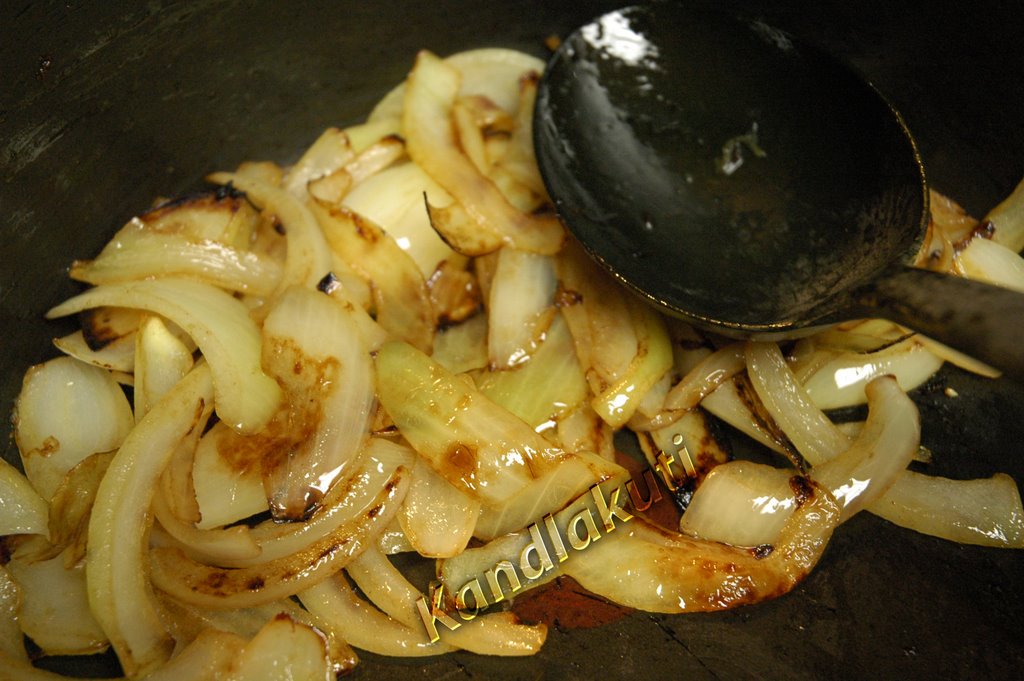
Cut onions roughly and fry in little oil in a wide and deep container till they turn to brown in color. Or else the traditional method is Fry onion whole on flame all around if it is possible and keep aside. I follow first method here. In india the another method. Keep thease onions aside. After it cools down, add this to above all masala ingredients in a blender or grinder and paste them. If needed you can add little water. Keep the paste aside.
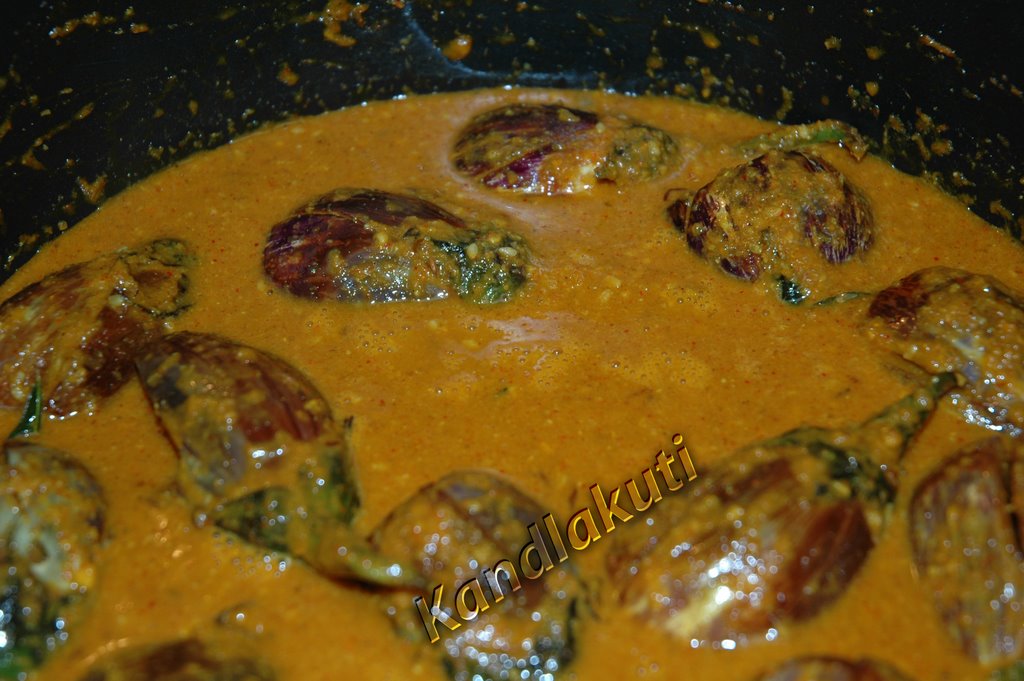
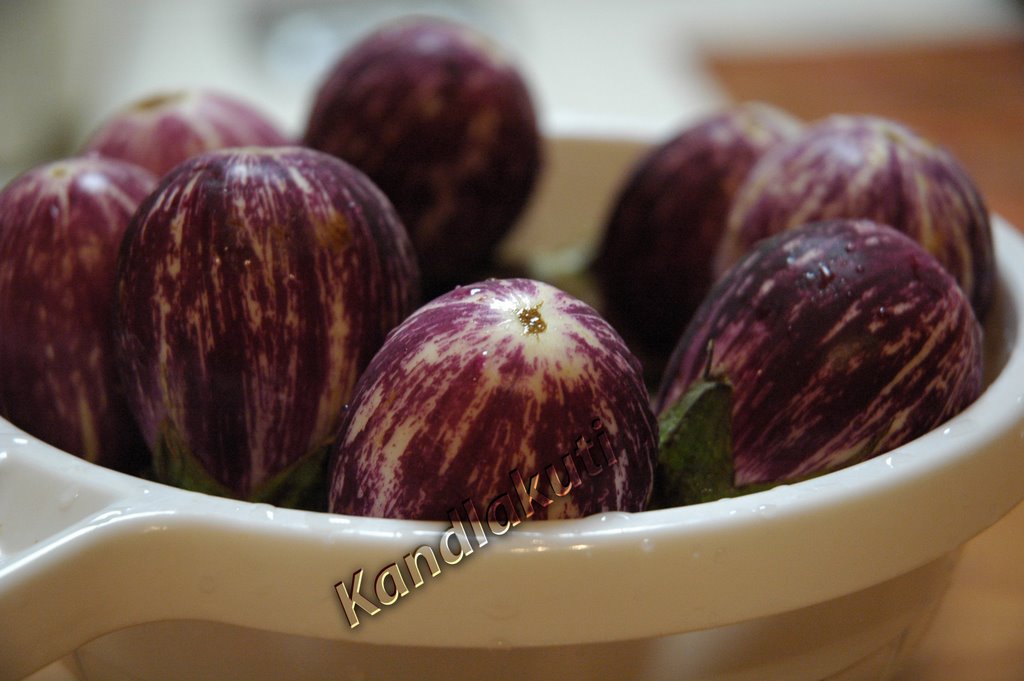
 Wash the brinjals and do not remove the tail. Since they help while eating brinjal or vankaaya in the curry. You can just grab a full one brinjal into your mouth with the help of tail:-)) But ofcourse again its your choice:-) I prefer keeping them as it is. Cut each one of the brinjals across. See here they are not cut completely till end. That means brinjal should be one, not four pieces. You can check in the beside pic. They are waiting to dip in the masala;-)
Wash the tamarind and soak in a warm water till tamarind becomes soft.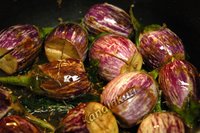 After that take juice out of it. Here, the tamarind juice should be thick. In the same container, in which you fried the onions, heat the recommended oil or as per your requirement and taste for main dish to cook. Add jeera or cumin seeds and fry until they start changing color. Cook this dish on medium heat. Now add curry leaves and fry them. Remember they should be crispy. Now add cut brinjals in to the container and fry till they turn into dark color all around. See the brinjals should not break.
 Now add the masala paste to above fried brinjals and mix well. See again brinjals should not break into pieces. Cook for 2 minutes with closed lid so that masala or spices get into the cut brinjals. After that add tamarind juice and mix well. Do not add any water here. That is why tamarind juice should be taken a/c to your gravy requirement. I.e., if you want more gravy than soak little more tamarind.
Allow to cook whole thing on medium heat till the brinjals are cooked well.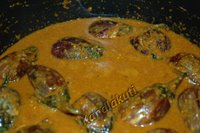 They should be soft and cooked well. Remember, brinjals are cooked fast like fish. Finally, add cilantro and close the lid and cook on low heat for couple of minutes and turn off the heat. Here, you can taste the gravy and can add required chilli powder, salt and coriander powder if needed. The Vanakaya Masala is ready to serve. This dish taste more better the next day or another day. So if you have some work next day than you can prepare this and keep aside (no need to refrigerate) and can enjoy next couple of days if you are going to cook in lots:-))
 Wash the brinjals and do not remove the tail. Since they help while eating brinjal or vankaaya in the curry. You can just grab a full one brinjal into your mouth with the help of tail:-)) But ofcourse again its your choice:-) I prefer keeping them as it is. Cut each one of the brinjals across. See here they are not cut completely till end. That means brinjal should be one, not four pieces. You can check in the beside pic. They are waiting to dip in the masala;-)
Wash the tamarind and soak in a warm water till tamarind becomes soft.
 After that take juice out of it. Here, the tamarind juice should be thick. In the same container, in which you fried the onions, heat the recommended oil or as per your requirement and taste for main dish to cook. Add jeera or cumin seeds and fry until they start changing color. Cook this dish on medium heat. Now add curry leaves and fry them. Remember they should be crispy. Now add cut brinjals in to the container and fry till they turn into dark color all around. See the brinjals should not break.
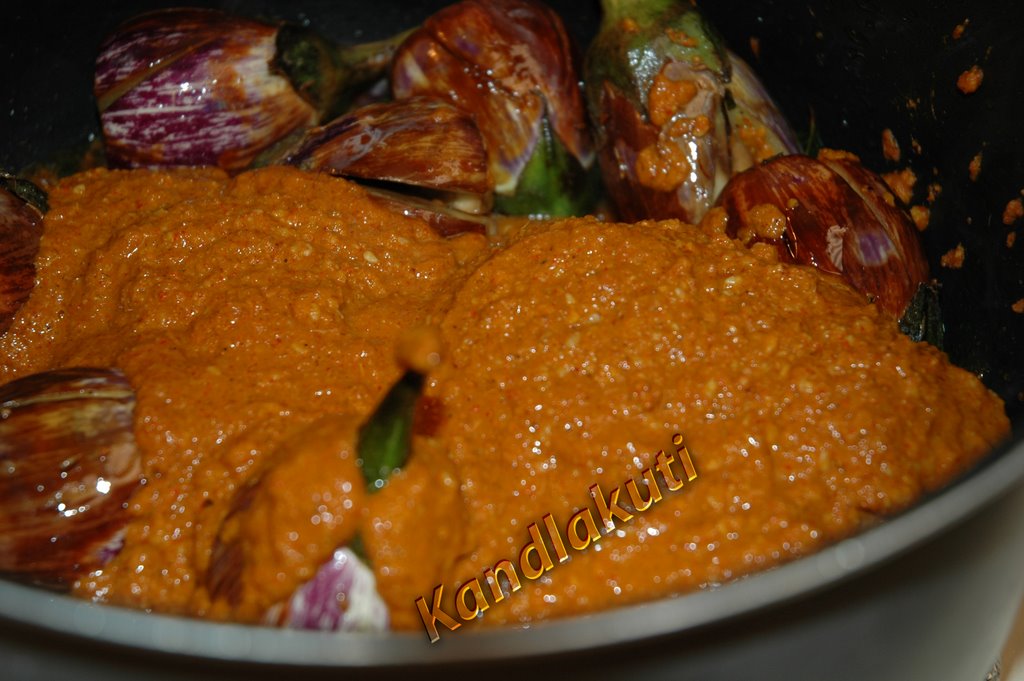 Now add the masala paste to above fried brinjals and mix well. See again brinjals should not break into pieces. Cook for 2 minutes with closed lid so that masala or spices get into the cut brinjals. After that add tamarind juice and mix well. Do not add any water here. That is why tamarind juice should be taken a/c to your gravy requirement. I.e., if you want more gravy than soak little more tamarind.
Allow to cook whole thing on medium heat till the brinjals are cooked well.
 They should be soft and cooked well. Remember, brinjals are cooked fast like fish. Finally, add cilantro and close the lid and cook on low heat for couple of minutes and turn off the heat. Here, you can taste the gravy and can add required chilli powder, salt and coriander powder if needed. The Vanakaya Masala is ready to serve. This dish taste more better the next day or another day. So if you have some work next day than you can prepare this and keep aside (no need to refrigerate) and can enjoy next couple of days if you are going to cook in lots:-))
My Variations:
-----------------
You can replace brinjals with fish pieces too. My mother cooks the same way for both fish and brinjals. Only difference is here you add brinjals first, where as If you use fish than add it after all the the masala and tamarind juice is cooked togeather and cook till fishes are done. Though brinjals are cooked fast, remember fishes are even cooked more fast comparitively.
Note:
---------
You can prepare all the spice powders by roasting them individually and powder them and can store, so that, when ever you want prepare this dish you can just add masala powders or spice powders then, which can save your time and energy. Also add methi powder still less if you want, since it gives little bitter taste, if added more. Recommended amount in this recipe is fine. Enjoy the dish:-))
Labels: brinjal curry, curries, masala brinjal curry, masala vankaaya koora, vankaaya koora, vcc, vegetable, vegetable dishes


