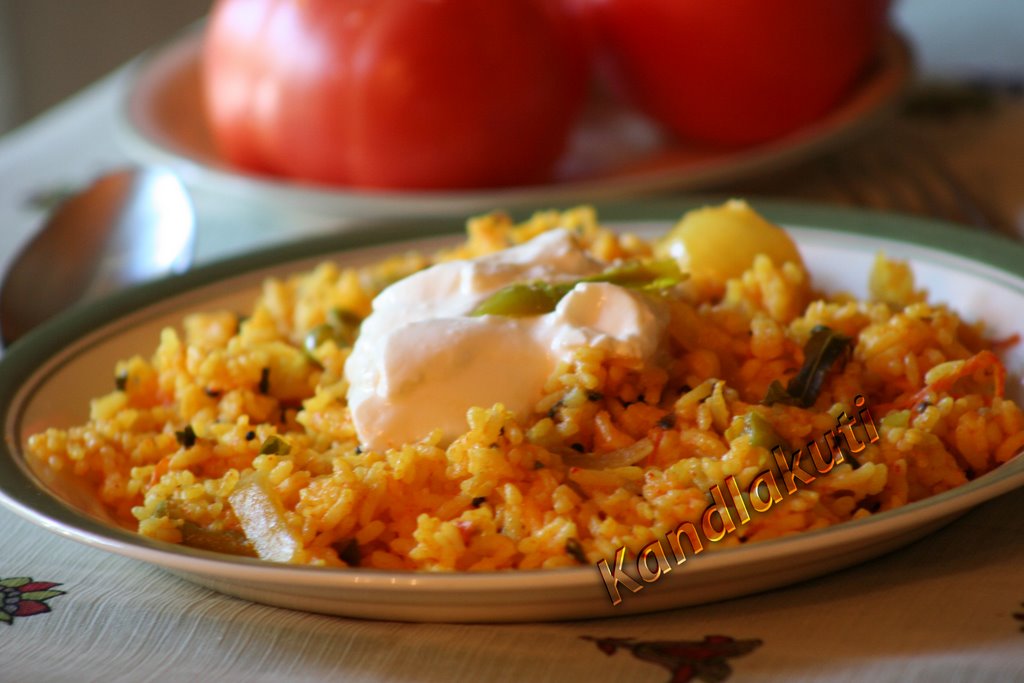
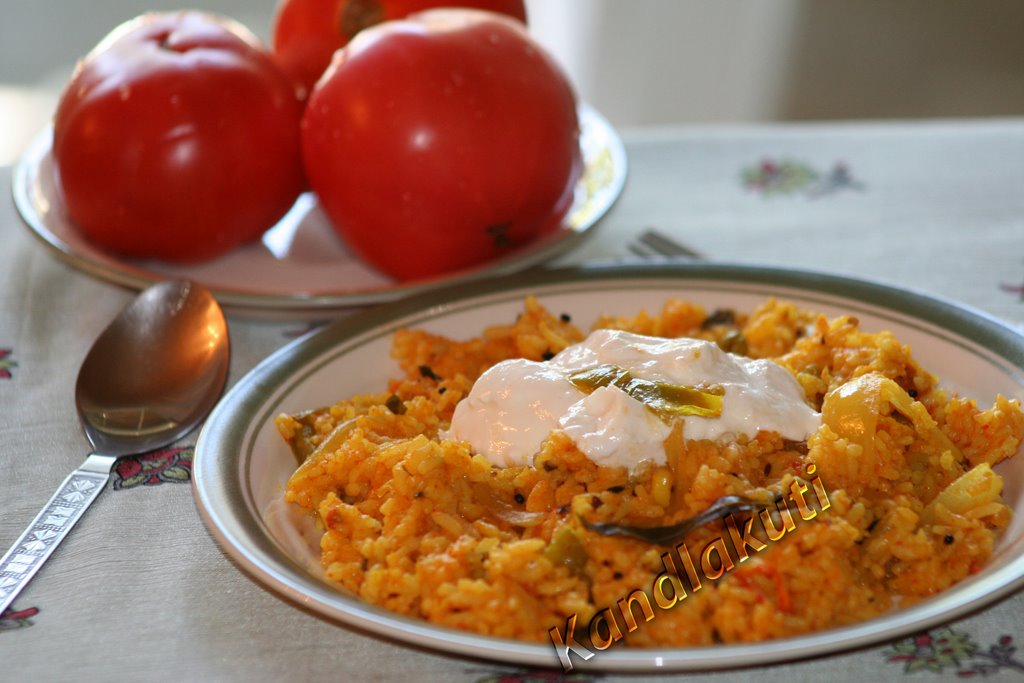
Chicken Biryaani & Perugu Chatni (Hyderabadi Special)
 Hi Friends! Today Iam back with my native place special dish "Chicken Biryaani". This is very special to me, because my mom is expert in cooking this dish and enjoyed by all of our family members on some special occasions. As the dish is almost cooked, every body comes to know about that. How? "The Aroma by which whole house is filled". And now, as a saying in hindi "Petme choohe doudrahe hey!!" every body goes directly to the dinning table and eagerly awaits for my mom, that when she will be back from the kitchen with a dish full of biryaani:-) I learned this dish from my mother. Till now I cooked several times for my family members and friends. Once I mentioned in food meme, this is one of my favourite food among those five. Generally, this is served with perugu chutney (yogurt spicy dip) or with any chicken gravy or masala gravy wich is given with the parcel of biryaani at any restaurant in India or Hyderabad. So today I go with the step by step traditional preparation of Chicken Biryaani .
Ingredients For Marinating Chicken:
----------------------------------------
Whole chicken 1 (skinned)
Pudina (Mint Leaves) bunch 1

Cilanto or Coriander bunch 1
Yogurt 1 cup (prefferabley 1 or 2 days set before yogurt) (can use low fat yogurt too)
Ginger-Garlic paste 2tbsp
Green chilli paste 2 to 3 0z (or make paste of 100gms of green chillies)
Elaichi or Cardamoms 20 no's (remove skin and make powder in a motar of 20 elaichi's)
Sajeera or Ajwain 1/2 tsp (they looks like cumin seeds but are little tiny and in double color which are not fennel seeds)
Lavanga or cloves(dried) 2
Bay leaf 2 (if small) or 1 (if big)
Cinnamon Sticks or Dalchini Patta 2 to 3
Salt a/c to taste (See the content and mix the salt. Just check with your finger tip dipped in marination and taste. Generally based on chicken and rice content)
Method For Marination:
--------------------------
- Wash the chicken well several times, drain water competely.

- Taken the chicken in a wide and deep pan (same pan in which you are planning to cook biryaani).
- Cut cilantro and mint bunches into small pieces.
- Mix with chicken. Also mix all above mentioned ingredients along with salt.
- Mix well every thing with chicken and keep aside. Marinate for minimum 1/2 hr (if you have plenty of time and plan this dish in advance, then better to marinate for 45 minutes)

-----------------------------------
Basmati or long grain rice 5 or 6 cups (above chicken consistency is sufficient for 5 cups and 6 cups rice also)
Saffron strands(or kunkum puvvu or kesari) a pinch of
Big onions 2
A cup of whole milk (also can take reduced fat milk)
Oil for deep frying
2 tbsp of Ghee or clarified butter (optional)
2 small lemons
Water as required
Method For Rice Preparation:
-----------------------------------

Cook rice in 1: 1 1/2 ratio (i.e., for 1 cup of raw rice take one and half cup of water). Drain rice on a paper or in any mesh container. Soak saffron strands in cup of milk and keep it aside. Cut onions into very very thin and long pieces. Deep fry them in the oil batch by batch. (Becareful here, as you deep fry onions , oil suddenly raises up, then decrease the heat. That is why it suggested to deep fry them in smal batches , till they turn into golden brown in color. drain them on a paper towel and finally remove them in a plate. Take juice out of lemon's and keep it aside.
It is suggested to prepare rice and deep fry onions in advance or prepare them while chicken marinates. Because, rice should be dried completely before proceeding to the main dish preparation. But also remember, first prepare chicken marination and allow it to marinate while you prepare other things. So plan accordingly in advance. Pour very little amount of oil(same oil used to deep fry the onions) in the chicken marination to avoid it from burning. Now, after the rice is dried completely, place a layer of rice on the chicken(which is kept for marination). pour some saffron milk on the first layer rice. Spread some deep fried onions on it. Again, place a layer of rice followed by saffron milk and deep fried onions. Repeat this till all the rice is placed in layers. Here divide the oinions and saffron milk equally for all the layers of rice. Once all the layers are over, on the top layer make some small wholes with your two fingers (say about 5 to 6). In that wholes, pour some oil in which onions were deep fried. (Here you can also add ghee along with oil for more taste). Pour the lemon juice all over the rice from the top.
Now, the final step is very very important in the birayaani preparation. We need to cover the pan with a plate which is equal size of the pan with some heavy weight on it so that no air can go inside. In olden days, they used to cover the pan with a plate and used to cover the complete edge with the dough by twisting itall around with the help of little water. And finally used to put some heavy weight on it. Another method is, take a clean, washed long cloth. Wet the cloth, twist it completely and tie around the edge of the pan. But, I followed simple method here. I covered with a flat plate which is little bigger than the pan in reverse direction and kept a heavy weight (used a heavy weight stone). I made sure that no air goes into it. But always if possible follow the ancient method, if not follow my easy method:-) Am I Confusing u??? Anyways...cook this on medium heat about 20 minutes. never increase the heat or decrease. Finally you will start getting the aroma, once the dish comes to end of the preparation. Reduce the heat to low for 5 minutes and remove from the heat. Just before serving, mix whole thing well. To avoid any problems in mixing whole thing always preffer large, wide and deep container to cook. It should have enough space to mix the whole thing properly. Chicken Biryaani is ready:-)
It is suggested to prepare rice and deep fry onions in advance or prepare them while chicken marinates. Because, rice should be dried completely before proceeding to the main dish preparation. But also remember, first prepare chicken marination and allow it to marinate while you prepare other things. So plan accordingly in advance. Pour
 very little amount of oil(same oil used to deep fry the onions) in the chicken marination to avoid it from burning. Now, after the rice is dried completely, place a layer of rice on the chicken(which is kept for marination). pour some saffron milk on the first layer rice. Spread some deep fried onions on it. Again, place a layer of rice followed by saffron milk and deep fried onions. Repeat this till all the rice is placed in layers. Here divide the oinions and saffron milk equally for all the layers of rice. Once all the layers are over, on the top layer make some small wholes with your two fingers (say about 5 to 6). In that wholes, pour some oil in which onions were deep fried. (Here you can also add ghee along with oil for more taste). Pour the lemon juice all over the rice from the top.
Now, the final step is very very important in the birayaani preparation. We need to cover the pan with a plate which is equal size of the pan with some heavy weight on it so that no air can go inside. In olden days, they used to cover the pan with a plate and used to cover the complete edge with the dough by twisting itall around with the help of little water.
 And finally used to put some heavy weight on it. Another method is, take a clean, washed long cloth. Wet the cloth, twist it completely and tie around the edge of the pan. But, I followed simple method here. I covered with a flat plate which is little bigger than the pan in reverse direction and kept a heavy weight (used a heavy weight stone). I made sure that no air goes into it. But always if possible follow the ancient method, if not follow my easy method:-) Am I Confusing u??? Anyways...cook this on medium heat about 20 minutes. never increase the heat or decrease. Finally you will start getting the aroma, once the dish comes to end of the preparation. Reduce the heat to low for 5 minutes and remove from the heat. Just before serving, mix whole thing well. To avoid any problems in mixing whole thing always preffer large, wide and deep container to cook. It should have enough space to mix the whole thing properly. Chicken Biryaani is ready:-)

Perugu Chutney Preparation:
---------------------------------
 Take 2 cups of fresh yogurt. Add 1/4th cup of mint leaves diced very finely. Add 2 ro 3 green chillies cut into very very smal pieces. Finally add required salt and water according to your desired consistency of chutney or pachadi. (you can also add cucumber pieces (skinned) and onion cut into very very small pieces just before serving). Prepare this in advance before biryaani preparation starts. Serve chill perugu chutney with hot biryaani rice.
Biryaani can also be cooked with not only chicken but also with mutton and for vegetarians with different vegetables know as vegetable biryaani or some name it as vegetable pulav. Ofcourse pulav has it own preparation method again. Biryaani also taste best with any chicken gravy or if you want have simple then go with perugu chutney. So friends, go a head and plan this for your next party or for your dear family on weekend or any day. Make sure you have enough time for this. I enjoy this preparation too. And ofcourse the final step where I get my favourite aroma which pulls me, where ever Iam in the house towards the kitchen. So here I present a plate of chicken biryaani with perugu pachadi for you and only 'YOU' !!

Note: Click on the images to see a better picture and idea. To make this dish more rich, add boiled eggs cut into half from top of biryaani and cover the pan.To enjoy this more keep some cut lime pieces to squeeze in the rice and some roughly cut onion rings to chew them in between:-)
Labels: biryaani, chicken, chicken biryaani, perugu chutney, rice, yougurt