Monday, January 22, 2007

Kajjikaayalu (Stuffed Halfmoon Dumplings)

Kajjikaayalu are one among those traditional sweets made during festivals, namely "Sankranthi" which falls in Jan; "Ugadi" in Mar/Apr ; "Deepavali" in Oct/Nov etc. Also made especially for marriages in India. This recipe I adopted from my mother. The speciality for this recipe is, they are made for my marriage with same stuff which is wrapped by the flour and are deep fried.Usualy, the stuff inside the kajjikaayalu varies. Some prepare with simple semolina, coconut and sugar mixture; and some also add peanut powder , chickpea flour etc. You are going to know about this mixture contents today in my recipe, which really makes kajjikaayalu more rich in taste. In Hyderabad we call it "Garijelu". But this sweet is famous with the name "Kajjikaayalu" all over Andhra. So with no delay further, Iam happy to proceed to todays recipe with detail explanation and pics to help you, in understanding and preparing this sweets.

Ingredients: (Makes Upto 20-25 no's Kajjikaayalu)
---------------
Maida or All purpose flour 1/2kg
Fresh Coconut 1 (or 1cup grated dry coconut)
Ravva or semolina (generally used for making upma) 1/2 cup
1/4th cup chickpea powder/ putnala podi (can add even 1/2 cup as you desire)
1/2 cup peanuts
10 to 12 Elachi' in No's
kaaju & kishmish (dryfruits) 1/4th to 1/2 cup
Sugar(fine) 1 1/2 cups (or as per taste)
1 tbsp ghee or clarified butter
Oil for deep frying and preparation
Water as required

Method For Preparing Dough:
---------------------------------
  1. Take maida in a deep vessel (enough to need freely) . Make a whole in betweet(some space with your fingers upto 3 fingures length). Heat one table spoon of oil and add in this whole, with a help of spoon mix the oil with flour well. (Caution: take care not to burn your hand or fingers here)
  2. Knead the above maida with required water to form a dough. Here this dough should be little harder than puri. Keep this aside.
Left: Dough ready to be filled Right: Filling & Dryfruits are ready to be wrapped

Method For Preparing The Filling:
-------------------------------------
  1. If you have fresh coconut, then separate the coconut from shell and make small length wise pieces and dry them in sunlight for 2 to 3 days. When they dry completely ,roast them till the raw smell disappear and make powder in a food processor or grinder. (Or else use ready made dry coconut powder available in Indian stores or in any other stores)
  2. Fry semolina or ravva in a 2tsp of ghee till all the raw smell disappears.
  3. Roast chickpeas, powder and keep it aside.
  4. Roast peanuts, remove skin, powder them and keep it aside.
  5. Remove skin of elachi and powder them.
  6. Fry dryfruits in 2 to 3 tsp of ghee or clarified butter.
  7. Mix all above powders togeather and measure the amount. For example, if above powders make 2 cups then add 1 1/2 cups of sugar to it.
  8. Finally add dryfruits to above mixture and mix well. Keep this filling aside.

(In Picture above) Roasted Powders : Left: Peanut powder + Elachi powder Above: Roasted Dry Coconut powder Below: roasted Chickpea powder Right: Fried semolina

Method To prepare Kajjikaayalu:
------------------------------------
Step1:

Make equal rounds out of the dough. (Approx 20 rounds). Take a round, flatten it like puri (little thin) spoon it with mixture, as shown above. Remember the spoon amount should be same for all the fillings. Here you can choose the amount to be filled. I like kajjikaayalu to be filled completely with the mixture, so I used more.

Step2:

Fold into half and close with the help of little water as shown above. Press the complete one end firmly.

Step3:

Above:Kajjikaayalu First Batch Is Ready For Deep Frying

Twist the complete one side end with your fingers as shown in the above pictures. You need very little practice to do this. Enarge the pictures above by clicking on them to have a clear view. Make batches , each batch should have same number of dumplings. It makes your job easy to divide them and store them. Slowly slide the duplings into oil for deep frying. See that oil is heated well prior to deep frying, so that dumplings does'nt absorb more oil. Fry them both the side on medium heat through out. Remove them once they are well fried into another plate witha paper towel on it, to absorb excess oil. Before you fry another batch and take them out, let the first batch of kajjikaaylu get dried on the paper towel. remove them and now keep in the container to be stored. Now!! Kajjikaayalu are ready to have with mudda pappu (cooked and mashed plain toordal with little salt) and little ghee on top. (this used be our breakfast for some days at my mom's place after they are made. Try this for sure. This combo is great (Kajjikaayalu with mudda pappu) You will just love this and will stick for sure:-))

Note: Store in the air tight container for freshness. You can enjoy eating this sweets for one week long. For more crispyness, make the flat round thin and see the mixture does'nt come out of it.

Labels: , ,

Wednesday, November 15, 2006

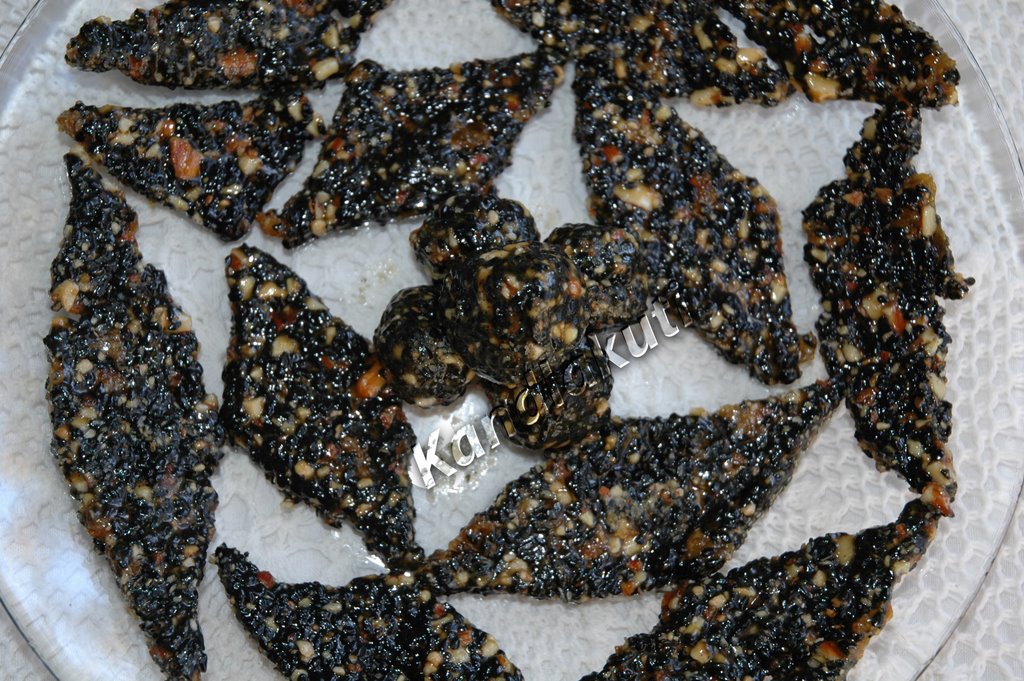
Dryfruits Sesame Bar (Dryfruits Til Chikki)

Black Sesame Seeds & Dryfruits(Baadam,Kaaju and Kishmish) Jaggery Chikkis

This recipe is adopted from TarlaDalal's Calcium Rich Recipes. As soon as I read this recipe, I was very much eager to try this out. Because, it is rich in calcium and very much good for growing children. Also, the recipe was very simple to try out. So why late?? With little variations in the recipe (or in correct words, I used some extra ingredients, to make it more rich in calcium as well as in taste). This is also another entry to the Jhiva For Jaggery, going to be hosted by Kay of "Towards A Better Tomprrow". Actual version name was Badaam Til Chikki. Since I added kaaju and kishmish (another two dryfruits), I renamed it as "Dryfruits Til Chikki". Sesame seeds, one of the ingredients in this recipe, is rich in calcium. I.e., is the reason for choosing this ingredient. You can read more about sesame seeds and black sesame seeds here. The another main ingredient used here is Jaggery or Gud or Bellam. This is used from ages in Indian culture especially for preparing sweets. It contains not only calcium, but also protiens, vitamins, iron etc. So here I go with the recipe....Before that A Very Happy Thanks Giving Holidays to all my readers and fellow bloggers. Iam going on a short trip on this vacation. I will be missing all your daily post for thease few days...but I will return with same enthusiasm, with which Iam ready to go for trip:-)) and will return with lot more traditional, religious and other intresting recipes to blog. And will catch you all at..Kay's Jhiva event for Jaggery. Happy Holidays!! Enjoy!!


Ingredeints:
--------------
Jaggery or Gud or Bellam 3/4th cup
Black Sesame seeds or Nalla Nuvvulu 1/2 cup
Dryfruits 1/4 cup (mixture of Baddam, Kaaju & Khishmish)
3tsp Ghee (I used cow ghee)
Little water (If required)

Method:
-----------
  1. Grate Jaggery and keep aside.
  2. Grind or grate dryfruits too and keep aside (as shown in above pic)
  3. Roast sesame seeds till they turn into light golden color (which acutually not much visible as golden color, but can find out when they start changing color, so roast for few minutes)
  4. Roast dryfruits too, separately not with sesame seeds. Allow to cool them both.
  5. Take a flat plate or on any flat surface, grease it with 1 tsp of ghee.
  6. Heat 2 tsp of ghee in a container, and add grated Jaggery to it. Stir continously, untill it melts completely and should become thick enough for makking chikkis. Just as we do for sugar syrup. But see that, If you put a drop in the syrup it should form a hard ball.
  7. Remove from the heat and add roasted sesame seeds and dryfruits and mix well.
  8. While the jaggery melts, if you think the syrup is less for making chikkis, add 1/4th cup of water and heat till syrup consistency. Or elase can take little more jaggery if needed.
  9. Pour the above mixture on the greases surface and roll with greased rolling pin. (Here I greased the chapathi making pin with little ghee and rolled over the mixture)
  10. Cut them into diamond or square or any other desired shape after it cools down. Healthy, rich in calcium Chikkis are ready to serve for children or any body as a snak or a sweet:-)

Note: Out of this praportion, I got 20'no chikki's. If you make more than store in a airtight container for long freshness.

Labels: , , , , , ,

Thursday, November 02, 2006

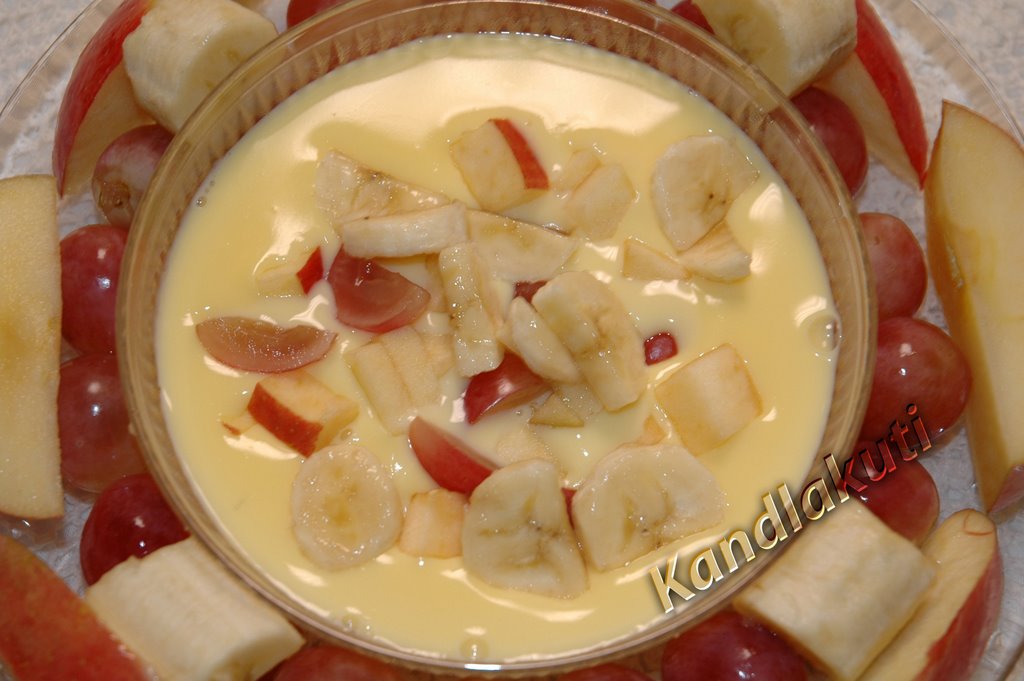
Fruit Custard

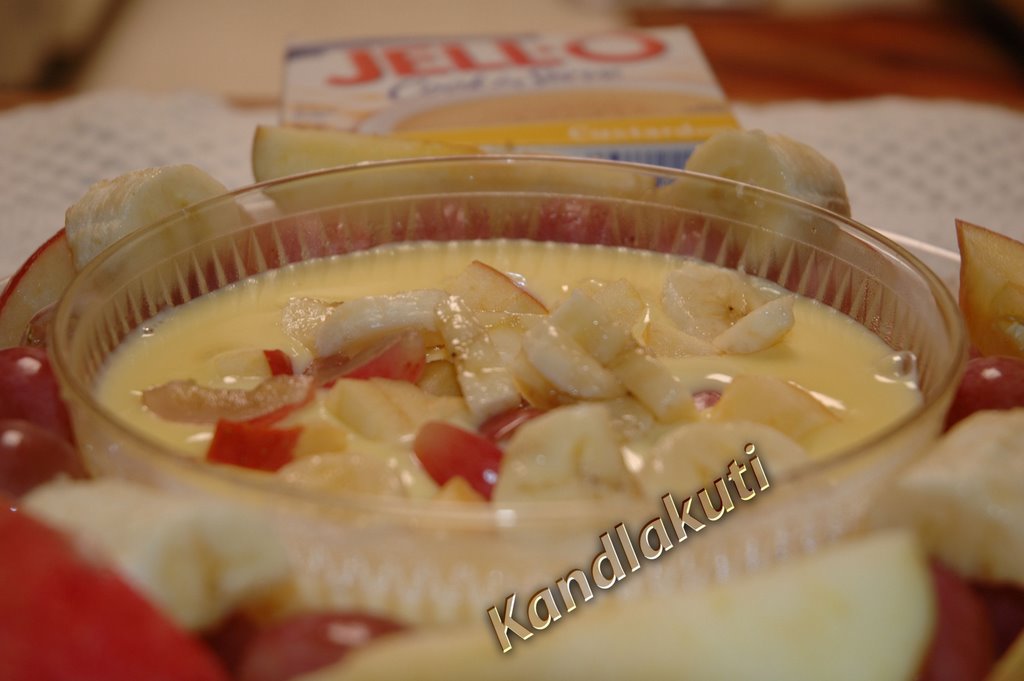
Custard Served With Fresh Fruits Namely: Apples,Bananas and Grapes

Fruit Custard is the easy one on the earth among sweets I think. Yeah!..even you think so. I knew that. Then why to blog?? The answer is simple..because I like it:-)) It really gave lot of comfort while enjoying this one. Actually speaking in true words..I made this for my son, who love fruits a lot, but not much in favour of sweets. Some times for his healthy fat requirement I make sweets for him. Stories about children just goes on, on & on....But always love to listen to their stories. So coming to this sweet, unlike traditional preparation, it is cooked in oven, just in 10 minutes. This was suggested my one of my friends, Chaaru. Thank you Chaaru..it was a delight. As she said I bought Jello-0 Custrad pack and made a/c to the instructions. You can always choose traditional method. But the one my mother used to make is more richer and tastier than this. But If you speak in terms of fat, calories..etc, etc.,....then better to go for this:-)


You Need:
----------------

Any Custard Ready Pack (I used Jello-O Custard) (As you all can see in the above pic)
3 cups of milk (low fat milk for Diet Conscious & Whole milk for Children&sweet lovers for best results)
A whole cup of Fresh Fruits a/c to your choice (I preffered- Bananas, Apples and Grapes)
An Egg (optional--Add in the mixture before boiling, If you want more rich custard) (I did not add)
Sugar (optional ---If you want more sweet than go for it a/c to your taste) (I did not add, but still very yummy!)

Micro Oven Method:
------------------------

  1. In a micro oven based container (always choose glass or thick plastic oven based but not thin plastic, since they are not good for health), take 3 cups of milk and mix the Ready Custard Powder in to that. See it is mixed well.
  2. Cook in micro oven about 10 minutes or untill the mixture comes to full boiling.
  3. In between cooking time, for every 3 minutes stir into the mixture to avoid any lumps formation.
  4. Allow to cool the mixture to the room temperature by sttiring in between. Remember, as it cools down it becomes more thick.
  5. Once it comes down to room temperature, store in the fridge for 1hr. And finally while serving, add your favourite fresh fruits and serve.
Note: After few hours in the fridge, the custard becomes more thick and very cool. In this winter for children or of any body best is...just warm the custard say about 30 to 40 sec and add fruits and serve. (Which I did for my son and my self:-)) Traditional method is also mentioned on the pack like micro oven method.

My Variations: You can add chocolate cream or fresh home made cream on the top of the custard and serve. My mother used add fresh home made cream i.e., taken above from the milk which is formed, after the milk is boiled and cool down.

Labels: , , , ,

Friday, October 27, 2006

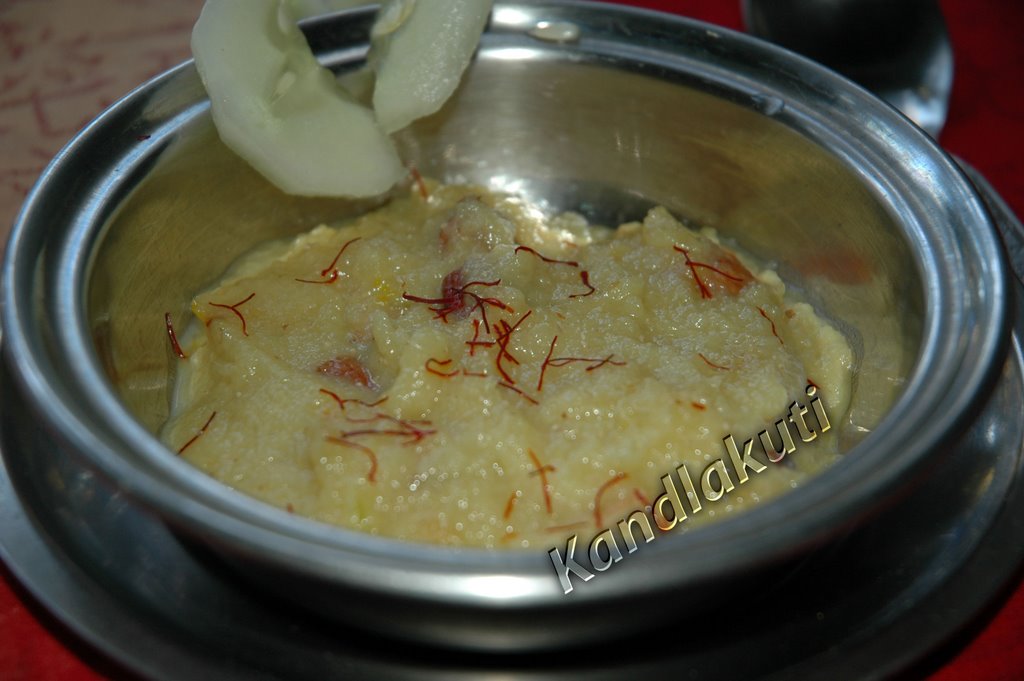
Kheera Kesari (Cucumber Sweet)


Kheera Kesari is my entry to Jhiva_Diwali Event. I made Boondi Laddoo's For Diwali, but was unable to take any snaps. I was quite dissapointed then. But as Manisha of 'Indian Food Rocks' said as far as we enjoy diwali, nothing much matters. Her words really gave a soothing touch. Thank you Manisha for those nice words. But to remove that little dissapointment, Vee of Past, Present and Me decided to make another round up for diwali event. Thank You Vee. But to say folks, we had really great diwali this year, sharing happiness with couple of friends and lots of lights in our home than any time before.

I thought of this sweet, seeing kheera in the refrigirator. Since it is cold season, we were avoiding eating kheera from long time. But, for my son I cooked this and gave him when it is warm. The taste was very good, good more than I thought of:-) I choose, this name, beacuse kesari (Saffron) gave real good aroma, color and taste to the sweet. And kesari being one of the ingredient, infact played a vital role in this, how can miss the name kesari for this dish. Also friends, do you remember "Kesari Vilaayathi" the villan in the famous, hindi movie called "Ram Lakhan". Can u tell the name of the actor who played Kesari Vilayathi role in the movie?? Lets see the response...Iam waiting??? So here I go....

Ingredients:
------------------
1 medium Cucumber(kheera)
4 tsp Sugar
1 tsp of Khus Khus
1 full tsp of Ghee (I used cow ghee)
1/4 cup of Milk (I used whole milk)
few Kaaju and Baadam
few strands fo Saffron (kesari or zaffron)

Method:
-------------
  1. Cut one round from both ends of cucumber and rub those ends with respective cut pieces. This I practice every time, because, it removes the sour taste which cucumber has or atleast I can say reduces to much level.
  2. Peel the cucumber skin . Cut into two halves and remove the seeds from it. Now cut them into small pieces and grate them in the food processor or as you do with carrot while preparing carrot halwa.
  3. Take a deep sauce pan, heat ghee and fry dry fruits till they are light brown in color and keep them aside.
  4. In the same pan, add grated cucumber and fry till all the water is evoparated. If you want you can add little more ghee before started frying cucumber.
  5. Now add 4 tsp of sugar , fry by mixing well till sugar is competely dessolved in it.
  6. Add milk, khus khus and saffron and cook until the sweet starts leaving the edges of the pan and coming togeather.
  7. Finally, remove from heat and serve warm with few more saffron strands soaked in little warm milk from the top.

Note: Since cucumber taste little soar, to remove that soarness do follow the steps I mentioned in the method above also fry it very well. I used only badaam and kaaju here, yo can also add kishmish (dry grapes) in it. One more important note is...the amount of sweet showed in the picture is result of only one cucumber. Since I cooked only for one person I used one ccucumber, if you are using two then double the ingredients accordingly or as per your taste which can always vary and we can make changes. Thank You!!

Labels: , , , , , ,

Thursday, October 05, 2006

Yummy !! Recipes From Fellow Bloggers

Hi Friends!! this time Iam here to blog some of my fellow bloggers recipes, which I tried at my home and took some snaps. Click!! Click!! :-)) Just not only thease infact I tried many from other fellow bloggers too. But some time I could take photos and some times not. Next time I will make sure to take them though Iam in hurry:-) Today Iam posting two recipes one is Bendakaaya pakodi vepudu from Krishna 'n' Arjuna's blog and another is Carrot Kheer from Mandira's Ahaar blog. One Hot and One Sweet.Yeah! both were really tasty.Give a try who did not yet...Iam sure you will like both to be taken warm in this cold season. Here they are.....
Bendakaaya Pakodi Vepudu


This dish when I gave a try and was having it as Arjuna said really I remembered marriage events of not only mine , but all of them where I have eaten this dish., though I don'nt remember exactly place, name and who's marriage it was.....;-) Friends do try this one its very tasty..though it does'nt look exactly as Arjuna's photo...I hope the taste was same:-) The recipe for this is here. In my dish bendakaaya looks more than pakodi unlike Arjuna's and also pakodi became little soft which actually taste good when they are crispy..so add them at the end of cooking to the bendaakaya and just fry for few seconds as they are already deep fried pakodi's.

Carrot Kheer

This thick creamy kheer was really tempting and was handy..that is the reason I tried it too soon, but with little variations in ingrendients and method..though not much.

Ingredients:

2 long carrots

2 to 3 tsp sugar

1 1/2 cup whole milk

1/4 cup water

2 tsp ghee

2 cardamom (make powder)

2 to 3 saffron sticks (for color and aroma)

few badaam and kaaju (dry fruits..can take any of your choice)

Method:

  1. Peel the carrot skin and wash them and grate them to very fine, best recommended is in food processor( If food processor is not there, can use hand grater too)
  2. In a deep skillet, add two tea spoons ghee and heat it. Then add grated carrots and fry till raw smell dissappears.
  3. Add sugar to that and fry for 1 to 2 min.
  4. Mean while make paste or tiny granules of dry fruits.
  5. Now add this paste and fry for 1 or 2 more minutes.
  6. Finally, add milk and water mentioned in the ingredients to this mix and allow to boil.
  7. Once it starts boiling add cardamom powder to it and allow to boil for 2 to 3 minutes.
  8. Remove from heat, allow to cool it to the room temperature.
  9. Now blend this total mixture in the blender for 1 to 2 minutes..so that it becomes more thicky and creamy. Add saffron to the kheer.
  10. The thick, creamy and flavored carrot kheer is ready to serve.

Note: Serve this warm or cold, I liked it both the ways!!

Actual version of this Carrot Kheer is here. Mandira..thank you so much for sharing such a wonderful recipe and also to the Arjuna. Though I made thease two dishes at different times..I think they go very well when served one after the other. I prefer hot first then sweet later..you can alter anyways:-)) Enjoy thease wonderful recipes. I will try to blog the other recipes of my fellow bloggers in the future when ever I give a try.

Labels: , , , , , , , ,

Monday, October 02, 2006

Banana Bread Halwa

Sweet Made with Whole Wheat Bread and Banana

Wish You A Very Very Happy Dassera!! to all my readers and to my fellow blogger friends. I wish a very good and peaceful life to all of us. After a week Iam back with a sweet dish, made for this festival. Also this is my entry for Jihva for Ghee and Butter for this month october declared by Cooking Medley. Iam bit late to post this as far as jihva for october month. Since, today is the festival Iam able to blog today.I hope she will accept this entry. Thank you!!!
Coming to this recipe, I got the idea of making some sweet from bread by seeing a mouth watering picture from sailu's food blog of Bread Halwa. I can not only imagine also can feel the taste of her bread halwa. Thank you sailaja for sharing such a beautiful recipe. I also had bananas at home, ofcourse for festival, but we do get them regularly since it is good in fiber. So both bread and banana being handy..I thought of this halwa:-)) Coming to recipe....
Ingredients:
-----------------
4 slices of oatmeal whole wheat bread (can use anybread, but may vary little in taste)
1 banana
3 cups of whole milk (1 cup equal to 250ml)
1/2 cup to 3/4 th cup of sugar ( vary a/c to the desired sweetness. I used 1/2 cup may be around 125 ml)
1/4th cup of water
Few cashews, almonds and raisins(dry grapes or kishmish) for garnish
3 to 4 tsp of ghee

Method
----------
  1. Mash banana and keep aside.
  2. Make small pieces of bread slices and fry them till brown in color in 2 tsp of ghee in a wide non stick pan. Make sure they are not burned. Keep them a side.
  3. In the same pan add 1/2 cup of sugar to the 3 cups of milk and water as mentioned in the ingredients.
  4. Allow milk to boil. Once it starts boiling, add mashed banana and mix well. Allow to cook for few minutes.
  5. Now add bread pieces to it and allow to boil. Since bread absorbs milk fast, overflowing of milk from the container can be avoided soon by just keeping it open till the bread absorbs the milk.
  6. After that, cover the pan and allow to cook on medium heat.
  7. Meanwhile, prepare for garnishing the dish. Heat 1 or 2 tsp of ghee in a small different container, and fry all the nuts and rasins till they turn light brown in color and keep them aside.
  8. It took 25 minutes for me to cook this dish. Cook till the halwa separates from the container. Just before removing from the heat add all fried nuts and raisins along with ghee into this halwa and mix well.
  9. In between cooking time, do mix the halwa frequently to avoid any burning.

Sweet Made with Whole Wheat Bread and Banana and Curd Rice with pepper Tempering

Note: Serve this dish warm in cold wheather or cook when you are watching an intresting movie and want to have this halwa. Hope you will all like as I did very much:-))

Labels: , , , , , , , , ,

MENU OF THE DAY

Last posts


Add to Technorati Favorites

Click to Join the Foodie Blogroll

Powered by FeedBurner

All the text and photographs Copyright © 2006-2007
Meena and Srinivasulu Kandlakuti
All rights reserved